From : John Bennett
Having been unexpectedly awarded the January 2005 pylon race, I
felt obliged to write a brief note on 'how I done it'.
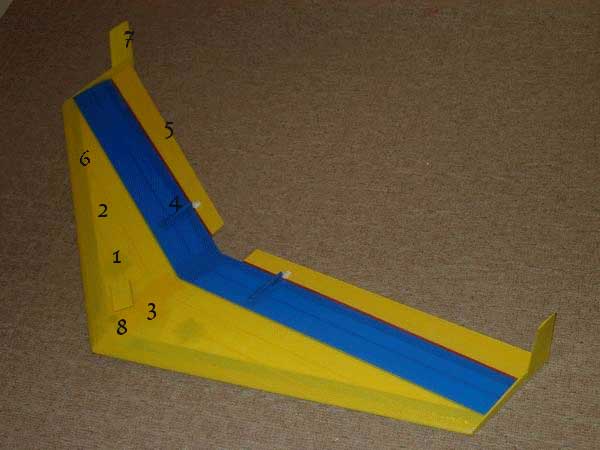
Modifications to the Zagi SI kit basic instructions:
- There is adequate section depth for a full-size servo with
a full-length output arm to be installed upside-down, without
breaking through the bottom surface. A cut-out can be made for
the servo arm with a piece of hot wire. For the push-rods I
bored the hole with a cold wire, then when satisfied that it
was in the right place, used a hot wire to open it up. Getting
it all connected is the challenge, see (3).
- Any steps, like between the EPP leading edge and the main
styrofoam panel are sanded to profile.
- The battery is permanently installed, as are the servos, with
expanding foam filler over the top, sanded to profile This is
before cross-weave tape is applied, to ensure a smooth result.
- Elevon push rods are faired in using pieces of aluminium drinks
can (Marston's Pedigree to be precise). These are simply taped
in position.
- Elevons are tapered section, from laminated hard balsa. The
leading edge is a plastic tube super-glued to the balsa, which
gives a bit more torsional stiffness, also somewhere to put
the aerial.
- Cross weave tape gives extra strength and also weight, but
most importantly it sticks well to the foam and gives a smooth
surface for the coloured stuff. I used two layers, with the
edges butted rather than overlapped, but with the joints in
the second layer offset from the first
- Tip fins are 0.8mm ply with balsa facing sanded to an aerofoil
section. This may not make much difference to the performance,
but it makes it easier to identify in a crowd.
- A considerable amount of nose-weight is required to balance
all the tape (about 5 oz from memory). This is rolled lead flashing
in holes cut with a tapered tube just behind the EPP. The original
ballast slot is filled in with expanding foam filler, as it
is always a weak point (crumples easily).
So that's about it. All this means, of course, that the build
time goes up from a couple of evenings (or one if you believe
the blurb) for the bog standard version, to as long as you're
prepared to spend. This one took more like six. Worth it? I think
so!
Stats
All-up weight: 27 oz. A good 50% heavier than standard.
CG position: 8 in. from the point. Any further back and
it grows teeth.
Old Yorkshire proverb
(with apologies to an advert for wholemeal bread):
In aerodynamics, there can be no doubt That gliders fly
better wi' nowt stickin' out.