After a summer flying an Eppi-SOAR (a rudder-elevator trainer) I contacted Stan Yeo of Phoenix Model Products
to see what he recommended as a next step up with ailerons. Stan recommended the Ban-SHE, which is
advertised a a "Crash Resistant EPP Sport Aerobatic Sloper".
 The BAN-She kit costs Ł57.95, to which must be added the Rx, Servos etc. - a full list with
approximate prices is at the end of this page. The kit comes with a reasonable set of
instructions to follow and an excellent set of plans.
In most cases I was able to work out what went where by working between the two, but I needed to
contact Phoenix Model Products on a few occasions - Stan was always very helpful.
The BAN-She kit costs Ł57.95, to which must be added the Rx, Servos etc. - a full list with
approximate prices is at the end of this page. The kit comes with a reasonable set of
instructions to follow and an excellent set of plans.
In most cases I was able to work out what went where by working between the two, but I needed to
contact Phoenix Model Products on a few occasions - Stan was always very helpful.
The first step is to assemble a simple ply box fuselage (watch out for warps) which houses the
rudder and elevator control linkages.
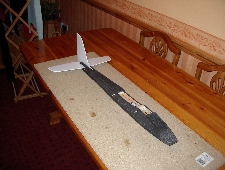
The tail assembly is then attached to the fuselage.
I mounted the wings on the fuselage to ensure that the tail assembly and the
wings were in line, and used epoxy to glue the tail assembly rather than spray adhesive.
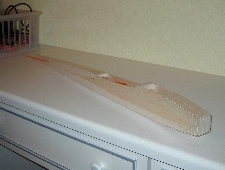
The ply box fuselage is then covered with EPP foam.
Any gaps in the EPP can be filled with bath sealant.
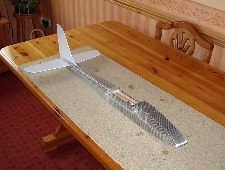
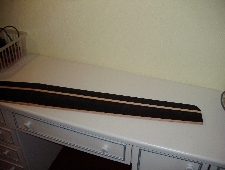
The EPP foam is covered with glass reinforced cross-weave tape.
A final decorative layer of coloured vinyl tape may be added.
Q: What has 4 legs, no drawers, a fuselage and a tailplane?
A: A model glider being built on a kitchen table.
The wing halves are pre-formed out of EPP foam.
Hardwood spars and trailing edges need to be glued in place, and the two halves joined
with a hefty piece of ply.
The wing is also covered with glass reinforced cross-weave tape plus a layer of vinyl tape.
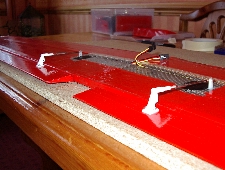
The rudder and elevator are controlled by standard servos mounted in the fuselage.
Two micro servos are buried in the underside of the wings to control the ailerons/flapperons
(the flapperons being coupled with the elevators).
 To check the balance point (both nose-to-tail and wing-to-wing) I fully assembled the
glider, and looped a piece of string beneath the wing bands at the stated balance point
(75mm back from the leading edge of the wing in the case of the Ban-SHE). I then suspended the
glider in mid-air using the piece of string. Lead can then be buried in the
nose/tail/left wing tip/right wing tip to make the glider balance. The instructions
recommended adding 60 grams of lead to the nose during assembly. I needed to add another
84 grams to make the model balance.
To check the balance point (both nose-to-tail and wing-to-wing) I fully assembled the
glider, and looped a piece of string beneath the wing bands at the stated balance point
(75mm back from the leading edge of the wing in the case of the Ban-SHE). I then suspended the
glider in mid-air using the piece of string. Lead can then be buried in the
nose/tail/left wing tip/right wing tip to make the glider balance. The instructions
recommended adding 60 grams of lead to the nose during assembly. I needed to add another
84 grams to make the model balance.
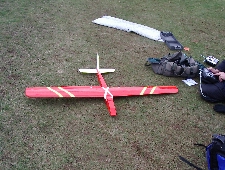
I asked Phil to check the setup of the model before the maiden flight.
The picture shows Phil adjusting the control surfaces on Selsey Common on a very cold day.
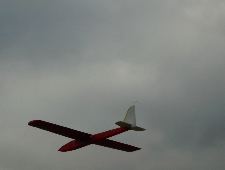
The maiden flight!
The model is quite heavy. It'll just about fly in a Force 2, but a Force 3+ is required to have
fun. It handles strong winds and survives heavy landings really well. Overall, I am
a bit disappointed with the Ban-SHE - it is too fast and furious for my limited flying skills.
Bits and pieces required and approximate prices:-
Basic Kit (includes glass reinforced cross weave tape) - Ł58; Rx - Ł30; Rx Xtal - Ł6;
Rx battery - Ł8; 2 standard servos - Ł13; 2 micro servos - Ł36; switch - Ł3;
2 extension leads - Ł4; vinyl tape - Ł4; spray adhesive - Ł4; epoxy - Ł8; aerial tube - Ł1;
lead - Ł2; 4 wing bands and 1 hatch band - Ł2; aileron hinge tape - Ł2